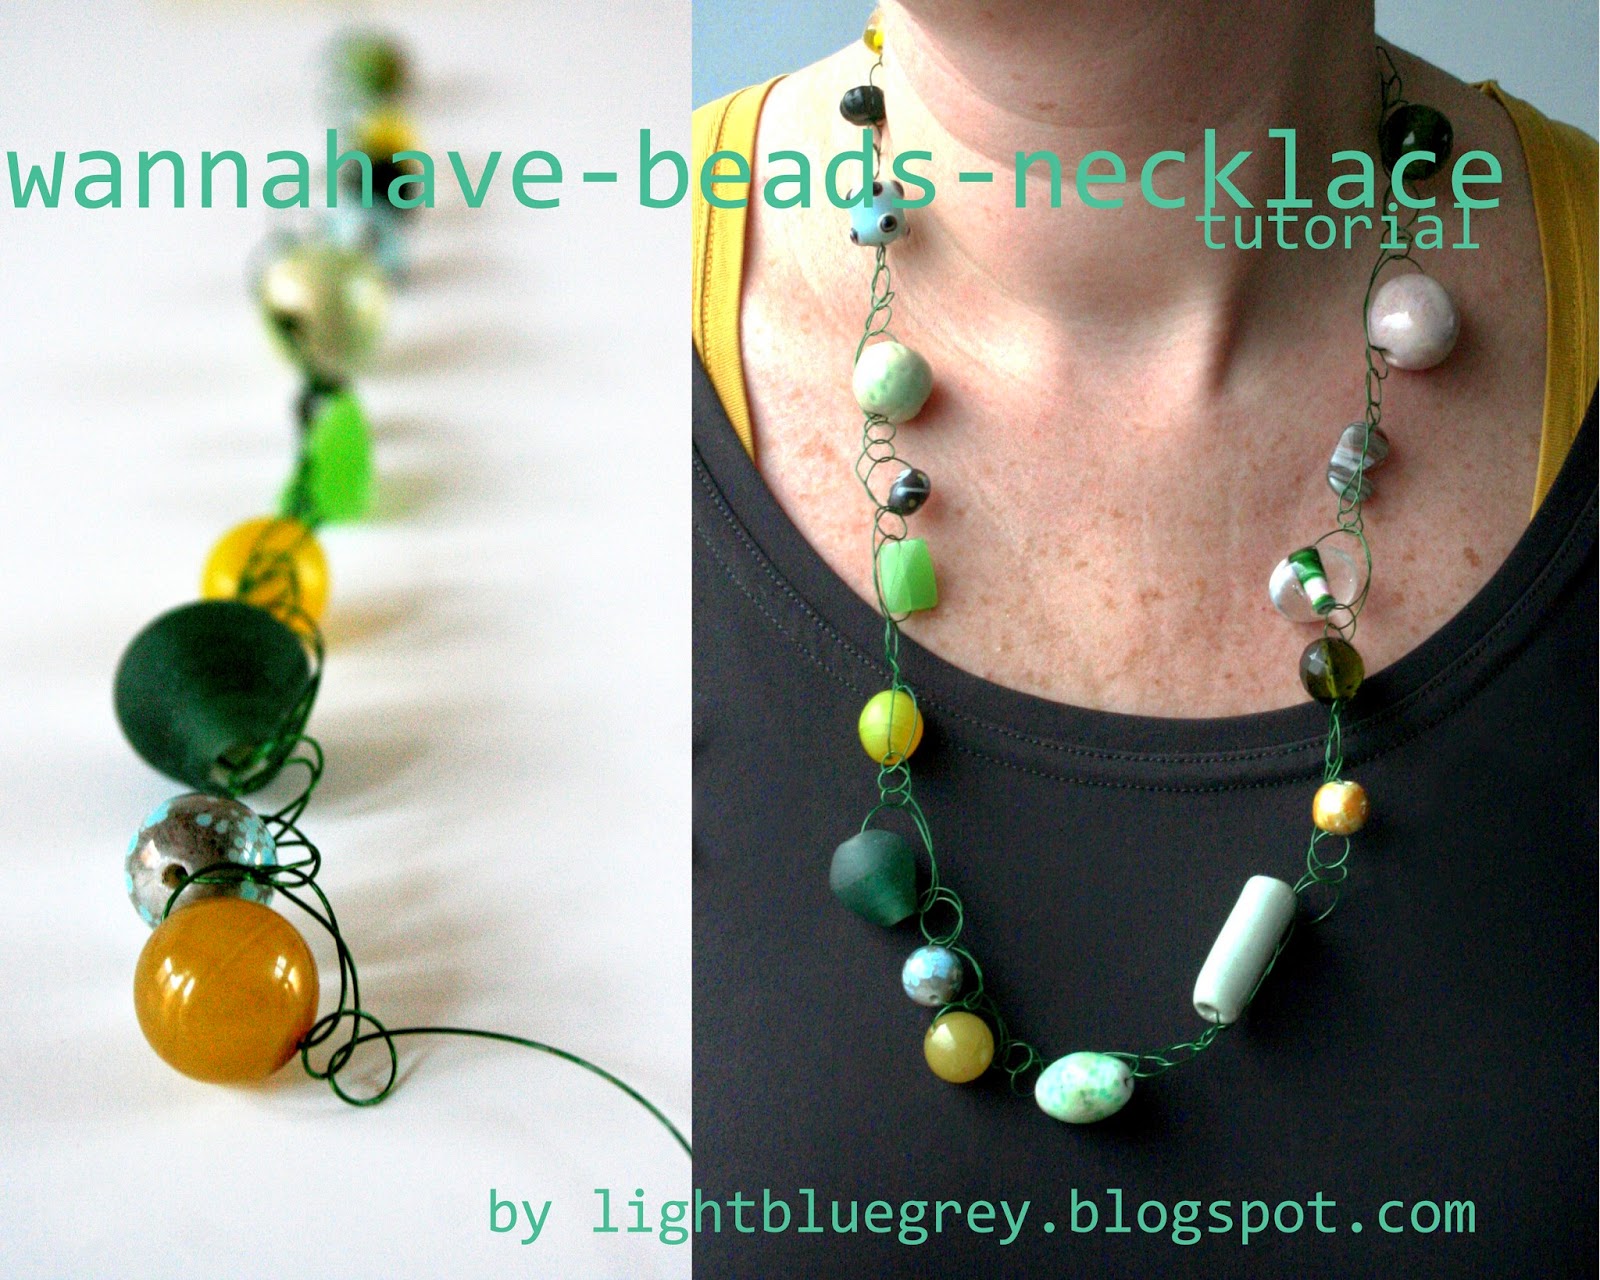
Wannahave-beads are best found in a not-being-internet shop. I think you should feel beads in your hand to make the right choice. And nosing around in beads shops is a feast to the eye! This tutorial brings you to a necklace to show the beauties you've bought.
If you like to read more about pictured necklace, just go
here. And if you like to read about different possibilities, just go
here,
here,
here and
here.
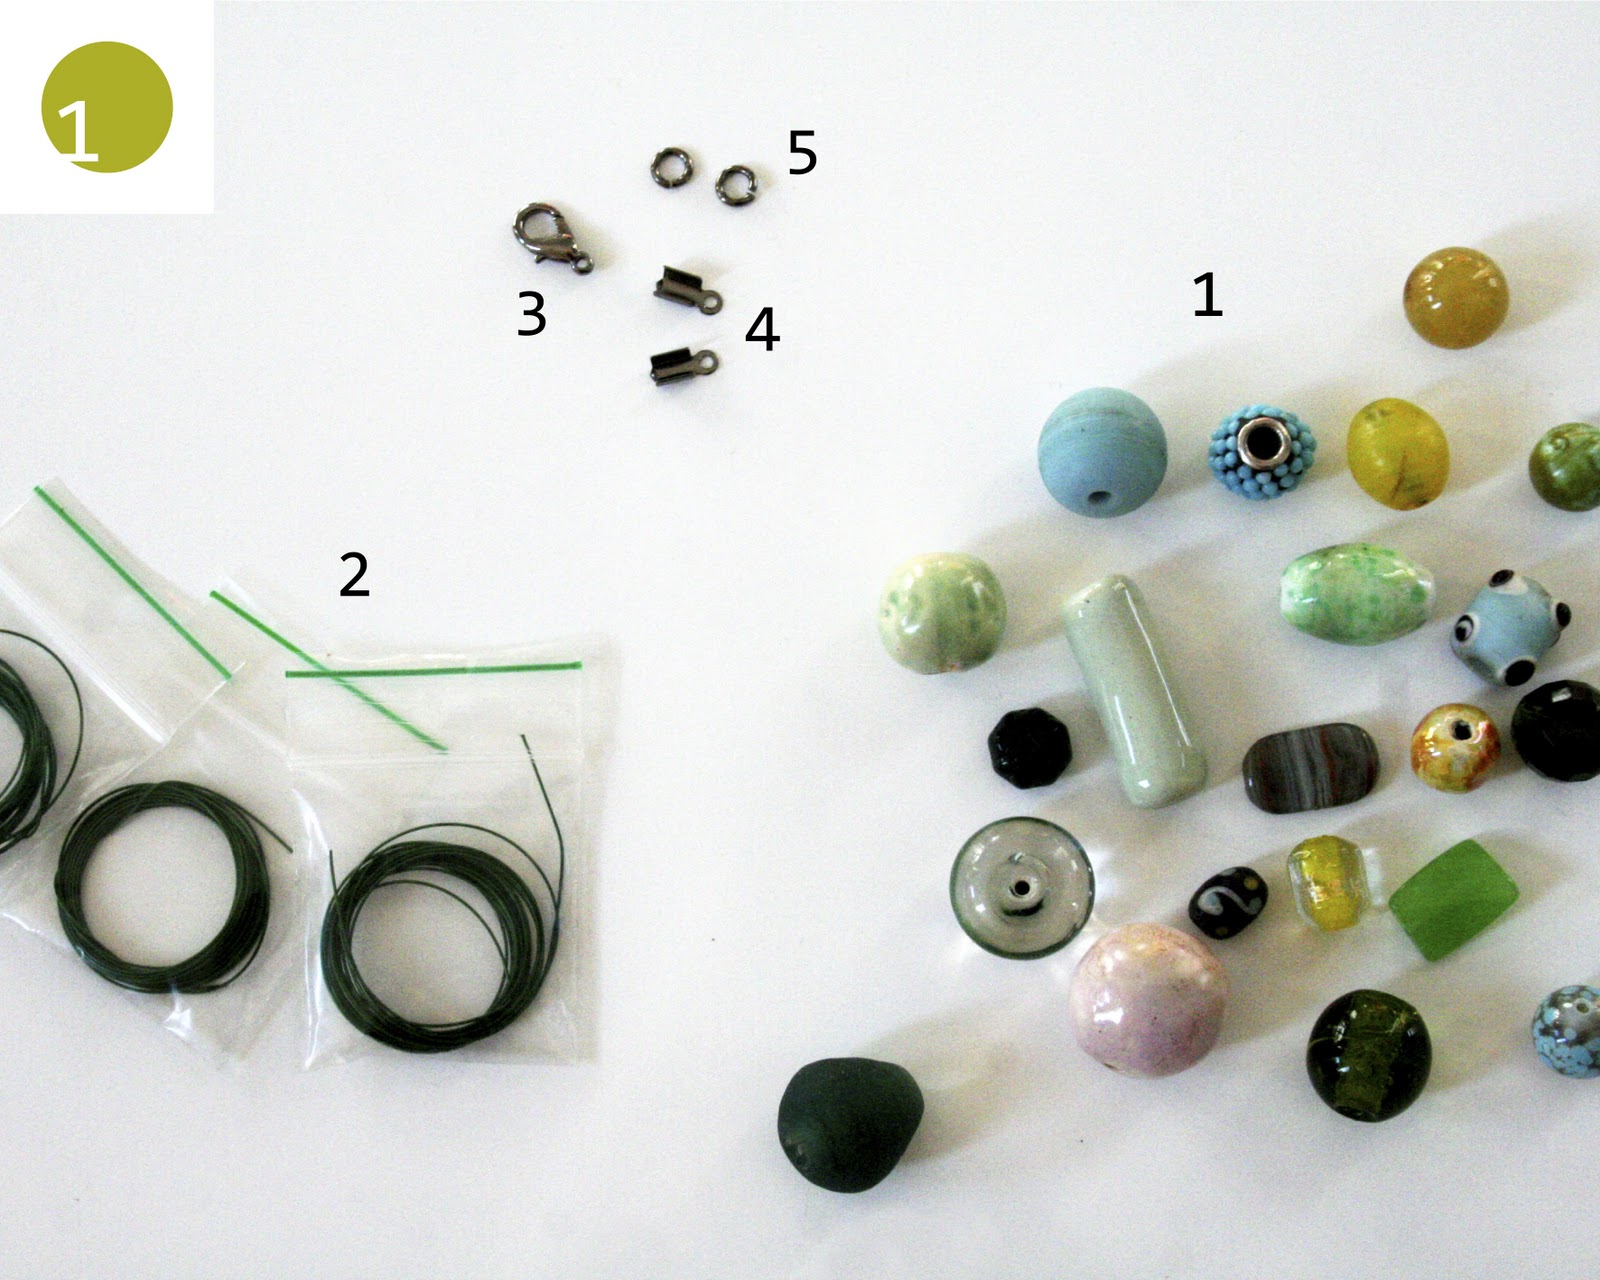
This is what you need to make a single wired necklace.
- a handful of beads you have fallen in love with
- wire. Length, thickness and color fully depend on your personal preferences. The wire I used was 3 meter long, estimated 0,5 mm thick and green colored. You could even lengthen the wire during the process by connecting one wire to another, using a tiny squeezable metal ring. You can get the tiny ring out of sight by positioning it inside one of the beads.
- a small lock
- 2 tiny open rings
- 2 foldable end pieces.
In case the length of the necklace is that long that you can put it over your head, you don't need the tiny pieces mentioned at 3, 4 and 5. All you need then is one tiny squeezable metal ring to attach both ends of the wire.
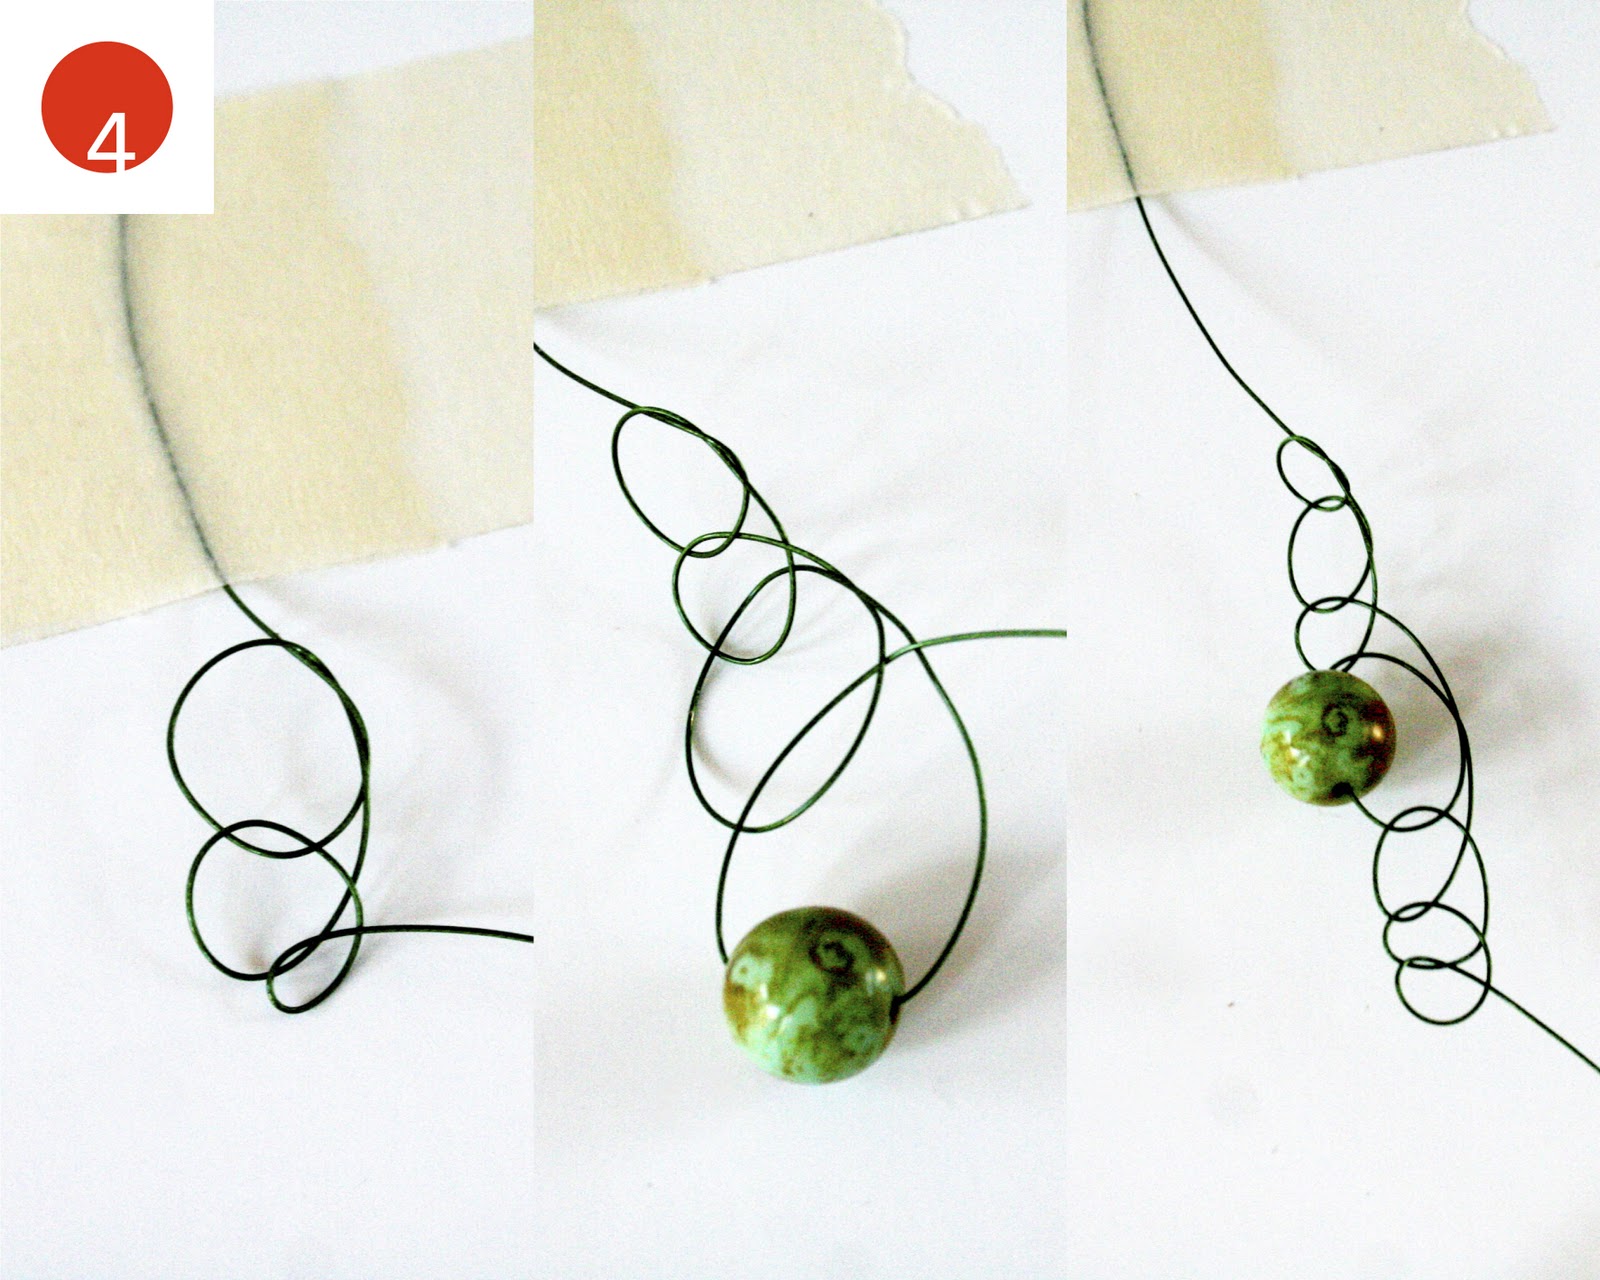
Get started. Stick a little piece of painter's tape to the end of the wire. Add another larger one on top, facing sticky sides. Stick this set to your table.
Make a loop. Now you should do this:
enter the end of the wire through the loop and then cross in front of the wire you're holding.
Actually this necklace is all about this last action. You should repeat it all the time in exactly the same way. Be aware of keeping the loops always on the left, so don't rotate your work. Add beads once in a while and just keep on repeating the described action.
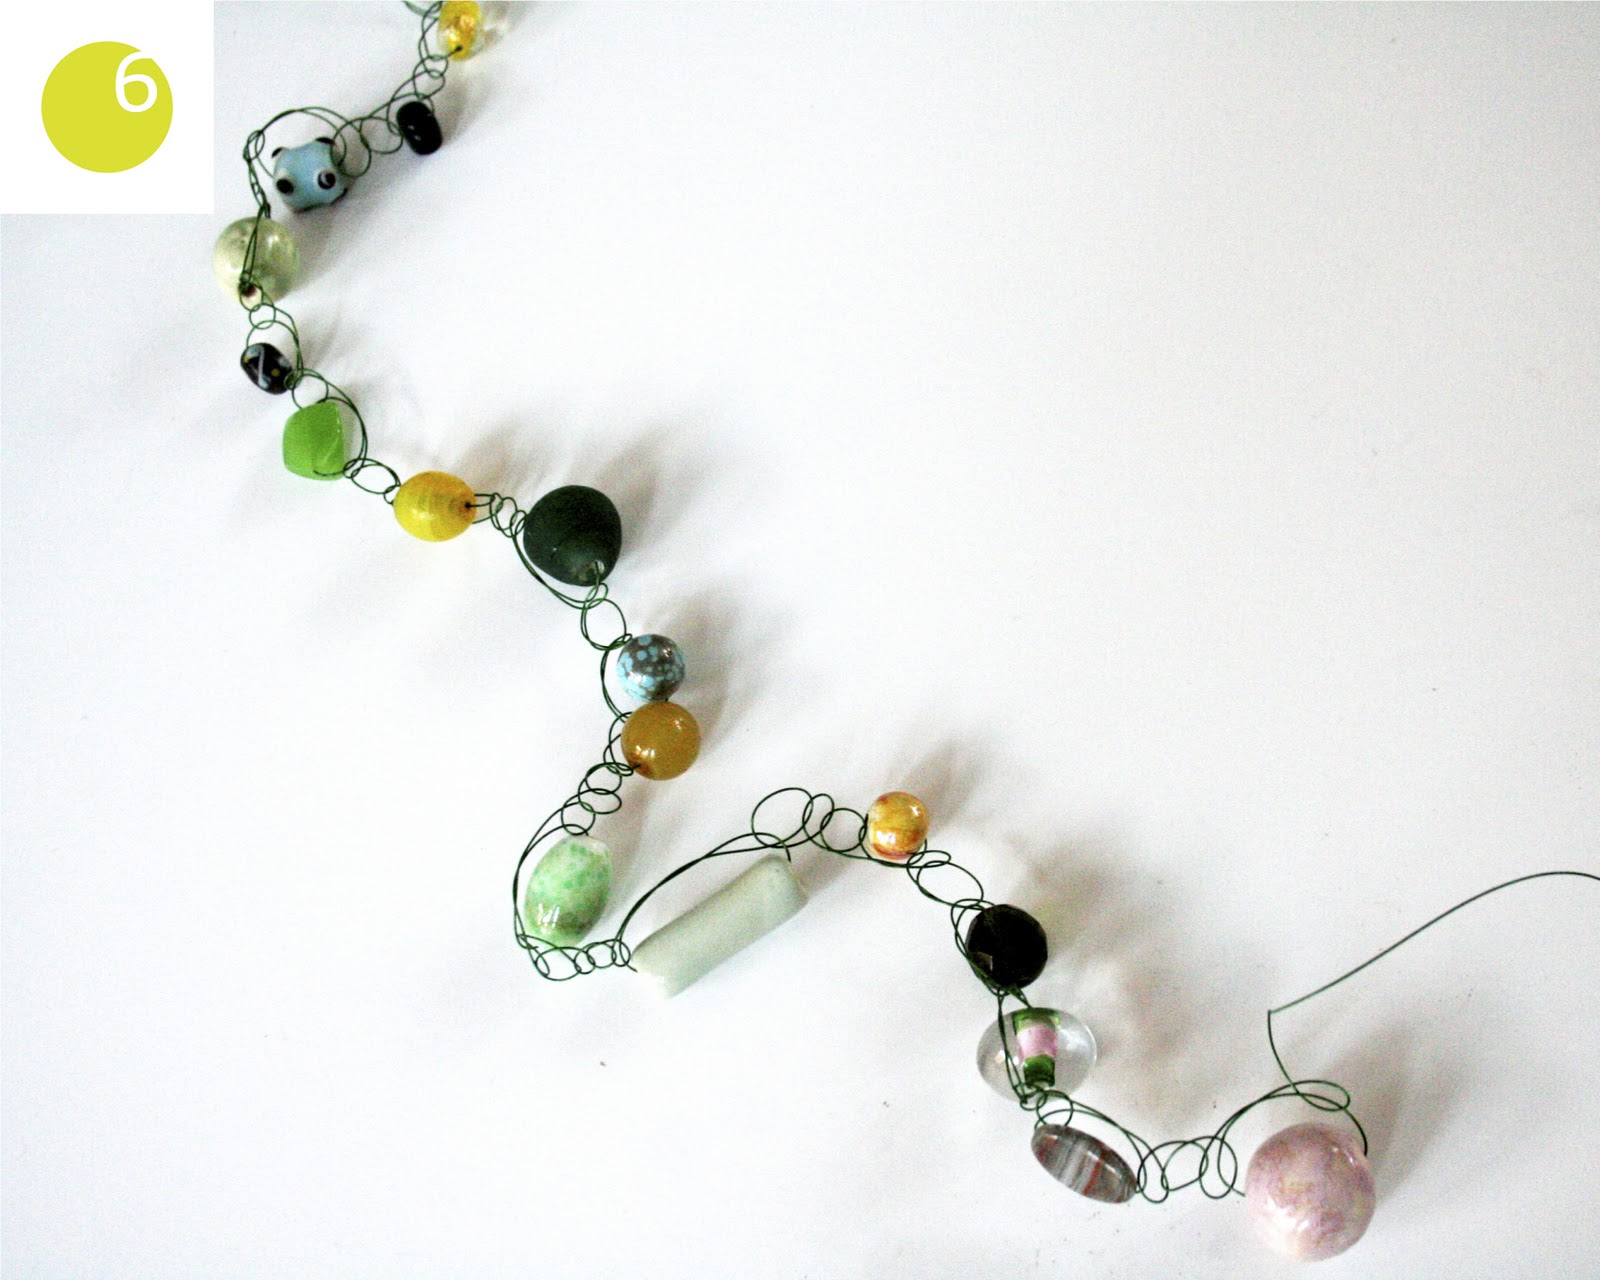
When nearby, let your child choose the next bead. Go on and on, but also plan ahead: measure roughly the desired length around your neck, devide through the number of beads and check every 10 or 20 centimeter if all planned beads will fit.
Something like this is what you'll get.
When you have reached the desired length it's time to finish. Add the end pieces on the beginning and end of your wire: first fold one side, then the other using needle-nose pliers. Press firmly and cut leftover wire as close to the end piece as possible.
Attach tiny rings and close them with needle-nose pliers. Attach the small lock on one side. You're done.
Try it on and look in the mirror!
This tutorial is for personal use only and may not to be used commercially.


8 comments:
Leuk! :D Je kunt ze ook haken (met lossen) met gecoat staaldraad (deed ik vroeger vaak)!
Dankjewel voor deze handleiding!
Beautiful necklace, thanks for the tutorial and inspiration!
Beautiful! I want to make one now too!
Playing It Cooley
What a fun thing to do with a handful of great beads. I am going to try it!
Leuk! Ik kwam hier via je laatste berichtje en vroeg me af wat voor draad je gebruikt. Dit ivm mijn metaal-allergie... Veel simpele/leuke/goedkope sieraden kan ik niet dragen maar zoiets als dit misschien wel!
@ Wiek: ik heb er eigenlijk zo weinig verstand van... Maar in die winkel in Amsterdam, zie post, heb ik ook een kunststof draad gekocht, zie rode ketting van vandaag. Hier ging het ook prima mee!
Hi! I´m from Guatemala, C.A. and I just discovered your blog, is impressive. I posted in my blog your tutorial of how make a necklace, http://petitdi.wordpress.com/2011/09/05/hacer-un-collar/. I will be visiting...
Post a Comment